I've always been a little underwhelmed by the yellow and blue Ikea sleeves you get with your oyster card, but generally stuck to using them over the years, along with another 'Guardian' one I got free in a newspaper... and then one day stylish travel called wallets started popping up here, there and everywhere, when shops started to capitalise on our willingness to spend a few quid on a holder that matches our own personal style.
Since my first visit Oyster purchase I've had a 'diy' oyster wallet project on my to-do-list and the more I've seen them popping into the shops, the higher my intentions have been to finally get around to doing it. It turns out that when you have one that you actually like the look of, you realise its great for a lot of things... mine will likely double as a 'just the basics' wallet for those times when all you need is a few bills, a debit card and your i.d.
Oyster Card Holder Tutorial/'Just the basics' wallet
What you'll need:
- Sewing Machine and Thread
- Outer Fabric* Cut to a 15 1/4" by 3 1/4" strip
- Inner Fabric Cut to a 5 1/2" by 3 1/4" strip
- Fusible Interfacing (medium weight) cut to 14 1/2" by 3 1/4" strip
Skills/Time: All you need to do is sew a straight line - should take about 20 minutes or so.
* you can use printed cottons, heavy cottons or vinyl coated cotton depending on your preference
Step 1. Cut out all your pieces - I use a rotary cutter, cutting mat and quilter's ruler for precision, they make my life so much easier and really speed up the potentially boring cutting process.

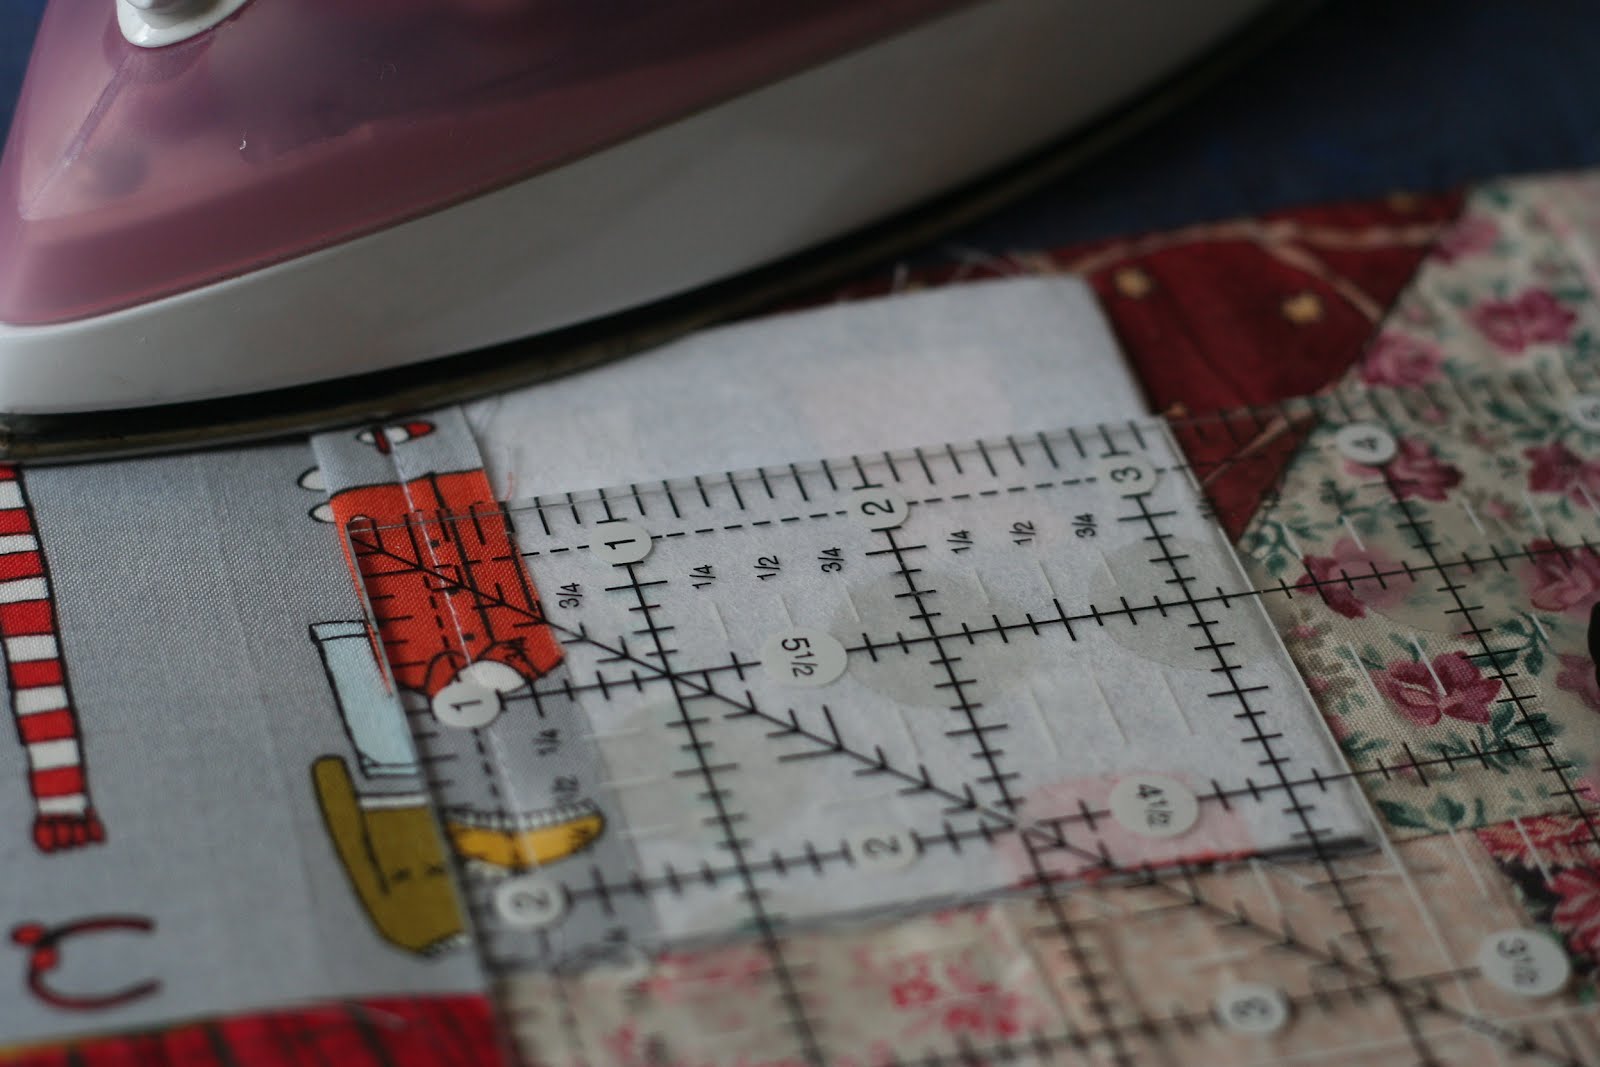
Step 2. Centre your cut piece of fusible interfacing, fusible side down on the wrong side if your outer fabric and iron. Your interfacing it shorter than your out fabric so try and centre it so that you have 3/8" overhang on either side. Press according to the instructions for your particular brand of interfacing.

Step 3. Press the overhand at either end of the interfacing and sew a 1/4 inch seam to finish either end. The quilter in me has the habit of sewing with a scant 1/4" seam (just shy of a 1/4" inch) so my measurements are based on that.

Step 4. Now Press the ends and sew a 1/4" seam on your inner piece to finish the short ends of it as well.
Step 5. Right side up, press either end of your outer piece in by 3 1/4" inch (you are creating the pockets of the wallet). They should be pressed so that they square up with the piece leaving a short space between either end (See photo).

Step 6. Now place your inner piece, face down and centered on your folded wallet (pin if you wish) - I obviously forgot to trim my ends here!

Step 7. Sew a scant 1/4" inch seam down either side of your wallet, backstitching at both ends.

Step 8. Trim threads, turn your wallet right side out, use a plastic ruler or crochet hook to poke out the corners and press!

Voila! Your very own - personalised oyster card wallet.

I've whipped up 8 of these in different colours - all of which will go on sale for Macmillan Cancer Support this week. Here is a shot of the fabrics I used which is a preview of what's to come.

Since my first visit Oyster purchase I've had a 'diy' oyster wallet project on my to-do-list and the more I've seen them popping into the shops, the higher my intentions have been to finally get around to doing it. It turns out that when you have one that you actually like the look of, you realise its great for a lot of things... mine will likely double as a 'just the basics' wallet for those times when all you need is a few bills, a debit card and your i.d.
Oyster Card Holder Tutorial/'Just the basics' wallet
What you'll need:
- Sewing Machine and Thread
- Outer Fabric* Cut to a 15 1/4" by 3 1/4" strip
- Inner Fabric Cut to a 5 1/2" by 3 1/4" strip
- Fusible Interfacing (medium weight) cut to 14 1/2" by 3 1/4" strip
Skills/Time: All you need to do is sew a straight line - should take about 20 minutes or so.
* you can use printed cottons, heavy cottons or vinyl coated cotton depending on your preference
Step 1. Cut out all your pieces - I use a rotary cutter, cutting mat and quilter's ruler for precision, they make my life so much easier and really speed up the potentially boring cutting process.

Step 2. Centre your cut piece of fusible interfacing, fusible side down on the wrong side if your outer fabric and iron. Your interfacing it shorter than your out fabric so try and centre it so that you have 3/8" overhang on either side. Press according to the instructions for your particular brand of interfacing.

Step 3. Press the overhand at either end of the interfacing and sew a 1/4 inch seam to finish either end. The quilter in me has the habit of sewing with a scant 1/4" seam (just shy of a 1/4" inch) so my measurements are based on that.

Step 4. Now Press the ends and sew a 1/4" seam on your inner piece to finish the short ends of it as well.
Step 5. Right side up, press either end of your outer piece in by 3 1/4" inch (you are creating the pockets of the wallet). They should be pressed so that they square up with the piece leaving a short space between either end (See photo).
Step 6. Now place your inner piece, face down and centered on your folded wallet (pin if you wish) - I obviously forgot to trim my ends here!

Step 7. Sew a scant 1/4" inch seam down either side of your wallet, backstitching at both ends.

Step 8. Trim threads, turn your wallet right side out, use a plastic ruler or crochet hook to poke out the corners and press!

Voila! Your very own - personalised oyster card wallet.

I've whipped up 8 of these in different colours - all of which will go on sale for Macmillan Cancer Support this week. Here is a shot of the fabrics I used which is a preview of what's to come.

This is a brilliant tutorial, I'll definitely be trying it out. Thank you! x
ReplyDeleteGreat - I'm going to give this a go x Jane
ReplyDeleteBrilliant tutorial and great fun to make, thanks!
ReplyDelete